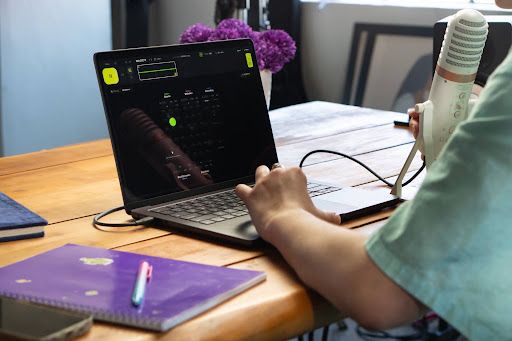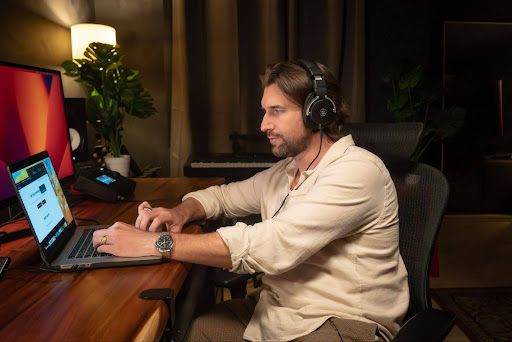
A music production workflow is a step-by-step process that takes a song from an initial idea to a finished release. Key stages of music production include songwriting, recording, mixing, mastering, and distribution.
This guide will walk you through each stage of the music production workflow and what to accomplish before moving to the next step.
What Is a Music Production Workflow?
A music production workflow is the structured sequence of creative and technical steps used to turn a musical idea into a finished song. It helps producers move through each stage in a logical order, from songwriting and recording to mixing, mastering, and release. While no two producers work exactly the same way, having a repeatable workflow makes it easier to stay organized, make creative decisions, and move smoothly from one stage of production to the next. In practice, these stages often overlap, and many producers move between them in a different order.
A typical music production workflow includes:
- Capture ideas
- Write the song
- Build the arrangement
- Produce sounds
- Record performances
- Edit recordings
- Mix the song
- Master the final version
- Release and promote the music
Without a structured workflow, it's easy to spend hours tweaking plugins, changing arrangements halfway through mixing, or abandoning projects before they're finished. A repeatable process keeps creative energy focused on the right task at the right time.
The Complete Music Production Workflow
Stage 1: Inspiration & Song Ideas
The first stage is about capturing ideas before they are forgotten. Rather than worrying about production quality, focus on collecting musical concepts that can be developed into complete songs.
Goal: Generate and preserve ideas that can become the foundation of the project. What to DoRecord melodies, chord progressions, rhythms, lyrics, or voice memos whenever inspiration strikes. Listen to reference tracks, experiment with instruments, and build an idea library that you can revisit when starting new projects.
Expected OutputBy the end of this stage, you should have:
- A clear musical idea
- Basic melody or chord progression
- Initial lyrical concepts (if applicable)
- Tempo and general mood
- Reference tracks for inspiration
- Waiting until you're in the studio to find inspiration
- Discarding ideas too quickly
- Overproducing a rough sketch
- Comparing unfinished ideas to fully produced songs
Stage 2: Songwriting & Composition
Once you've chosen a strong idea, the next step is to turn it into a complete song. This stage focuses on writing the music itself before making production decisions, ensuring the composition has a solid foundation.
Goal: Develop a complete song with a clear structure, melody, harmony, and lyrics. What to DoBuild the verses, chorus, bridge, and other song sections while refining the melody, chord progression, and lyrics. Aim to complete a rough song structure in a single focused session, then revisit it with fresh ears rather than editing every detail during the same session.
Confirm the song's key, tempo, and overall direction before moving into production. If the song works with simple accompaniment, it is likely ready for the next stage.
At this stage, consider:
- Song structure (verse, chorus, bridge)
- Chord progression
- Melody development
- Lyrics
- Key and tempo
- Emotional progression
Avoid becoming distracted by plugins or sound design while the composition is still evolving.
Expected OutputYou should finish this stage with:
- A complete song structure
- Final melody
- Working lyrics
- Chord progression
- Tempo and key confirmed
- Editing sounds instead of finishing the song
- Constantly changing keys and tempos
- Writing sections without considering the overall structure
- Starting new songs before finishing existing ones
Stage 3: Arrangement & Pre-Production
Arrangement transforms a completed song into a production plan by deciding how each section unfolds. Pre-production is the opportunity to experiment with instrumentation and dynamics before recording begins. Compare your arrangement with one or two professionally released reference tracks to evaluate pacing, transitions, and energy before recording final performances.
Goal: Plan how the finished record will develop from beginning to end. What to DoDecide where instruments enter and exit, how the song builds momentum, and how each section transitions into the next. Use demo recordings, MIDI instruments, or scratch vocals to test ideas before committing to final performances. This stage is also a good time to remove unnecessary sections and refine the overall pacing.
Expected Output- Final song arrangement
- Instrumentation plan
- Section lengths and transitions
- Production notes
- Demo ready for recording
- Recording before the arrangement is finalized
- Overcomplicating the arrangement with unnecessary layers
- Repeating sections without variation
- Leaving major structural decisions until mixing
Stage 4: Production & Sound Design
With the arrangement complete, it's time to develop the song's sonic identity. This stage focuses on selecting instruments, creating sounds, and building the production while staying true to the original musical vision.
Goal: Transform the arranged song into a fully produced track with intentional sound choices. What to DoReplace placeholder sounds with final instruments, program drums, create synth patches, record virtual instruments, and add textures that enhance the arrangement. Organize tracks, buses, and effects as you work so the project remains manageable during editing and mixing. Every production decision should support the song rather than distract from it.
If you're working in a DAW such as Cubase, create organized tracks, color-code instruments, and group related channels early. Good session organization saves time during editing and mixing.
Expected OutputBy the end of this stage, you should have:
- All production elements in place
- Final instrument selection
- Complete drum programming
- Sound design finished
- Arrangement fully produced
- Continuously replacing sounds instead of moving forward
- Adding unnecessary layers that clutter the mix
- Using too many plugins simply because they're available
- Designing sounds before the arrangement is finalized
Stage 5: Recording
Recording is where your ideas become polished performances. Whether you're tracking vocals, guitars, live instruments, or MIDI performances, the focus should be on capturing expressive takes in a well-prepared recording session.
Goal: Capture clean, expressive performances that require minimal correction later. What to DoPrepare your recording space, set proper input levels, and confirm that microphones, audio interfaces, and monitoring are working correctly. Record multiple takes where necessary, but prioritize performance quality over quantity. If you're working with other musicians, communicate the song's arrangement and expectations before recording begins.
Expected OutputYou should finish with:
- Clean vocal recordings
- Instrument performances
- Multiple usable takes
- Organized recording sessions
- Minimal technical issues
- Recording without proper session preparation
- Clipping audio because of high input levels
- Recording too many unnecessary takes
- Ignoring room acoustics
- Focusing on technical perfection instead of emotional performance
Stage 6: Editing
Once recording is complete, editing prepares every track for mixing by correcting technical imperfections while preserving the feel of the performance.
Goal: Prepare every recording for mixing by correcting technical issues while preserving natural performances. What to DoSelect the strongest performances, remove unwanted noise, tighten timing where necessary, and apply subtle pitch correction if required. Clean up silence between phrases, create smooth crossfades, and organize the session by naming tracks and removing unused recordings.
Expected Output- Final comped performances
- Clean audio files with minimal noise
- Corrected timing and pitch
- Organized, mix-ready project session
- Excessive pitch correction
- Over-quantizing performances
- Leaving unnecessary noise in recordings
- Keeping unused tracks inside the project
- Editing while making mix decisions
Stage 7: Mixing
Mixing combines every recorded and produced element into a balanced, cohesive song. The objective is to ensure that each instrument has its own space while supporting the track’s overall emotion.
Goal: Create a balanced, cohesive mix where every element has clarity, depth, and space. What to DoStart by balancing volume levels and panning before using EQ, compression, reverb, delay, and automation. Compare your mix with professionally produced reference tracks and listen on multiple playback systems to evaluate translation.
Expected Output- Balanced mix with clear instrument separation
- Controlled dynamics
- Cohesive stereo image
- Final mix ready for mastering
- Over-processing every track with plugins
- Ignoring gain staging and headroom
- Mixing for long periods without taking listening breaks
Stage 8: Mastering
Mastering is the final stage of audio production before your music is released. It refines the completed mix, so it translates consistently across streaming platforms, headphones, speakers, and other playback systems. While mastering adds the finishing polish, it works best when the mix is already balanced and free of major issues.
Goal: Prepare a polished, distribution-ready master that sounds consistent across different listening environments. What to DoListen to the final mix critically and make subtle adjustments to its overall tonal balance, dynamics, and loudness. Compare the master with professionally released tracks in a similar genre, test it on multiple playback systems, and export it in the formats required by your chosen distribution platform.
Yamaha Creator Pass Growth and Pro Pass include access to LANDR AI Mastering, which can help you prepare a polished, release-ready master before distribution.
Expected OutputBy the end of this stage, you should have:
- Final master
- Distribution-ready audio files
- Platform-compatible formats
- Consistent playback quality
- Using mastering to fix poor mixes
- Pushing loudness too aggressively
- Ignoring streaming platform normalization
- Exporting incorrect file formats
- Skipping quality checks
Stage 9: Distribution & Release
Once your master is complete, upload it through your preferred distributor, complete your metadata, and prepare your promotional assets. Yamaha Creator Pass lets you activate distribution services through your Yamaha account, making it easier to move from a finished master to a scheduled release without managing multiple subscriptions.
Goal: Publish your music with a coordinated release plan that reaches your audience. What to DoUpload the final master to your preferred distributor, complete the song metadata, add cover artwork, and schedule a release date. Schedule your release two to four weeks in advance to allow time for artwork, metadata, and playlist submissions.
Before launch, prepare promotional content for social media, email, and other channels so you can build awareness before and after the release.
Expected Output- Scheduled release
- Completed metadata
- Approved cover artwork
- Distribution-ready files
- Promotional plan and assets
- Rushing the upload process before verifying files
- Submitting incomplete or inaccurate metadata
- Waiting until release day to start promotion
- Overlooking final quality checks before distribution
How Music Production Workflows Vary by Producer
The core stages of a music production workflow remain the same, but the focus shifts depending on your creative goals, production style, and how you share your music.
| Producer Type | Workflow Focus | Biggest Priority | Challenge | Key Action |
|---|---|---|---|---|
| Beginners | Learning to move through all 9 stages in order, one at a time | Finishing a complete song rather than perfecting any single stage | Skipping stages (e.g. mixing before the arrangement is done) or abandoning songs before they're finished | Follow the stages in strict order and aim to complete songs regularly, even if imperfect |
| Solo Artists | Owning every stage, creative, technical, and promotional, without a team | Switching cleanly between creative, technical, and business mindsets without blending them in one sitting | Context-switching mid-session (e.g. mixing a vocal, then stopping to design cover art) derails focus and slows finishing | Try to dedicate each session to one mode only. Mixing modes in the same sitting can slow both down |
| Electronic Producers & Beat Makers | Blending songwriting and sound design together instead of following stages in sequence | Recognizing when a sound is finished, since there's no natural endpoint the way a vocal take has one | Endless sound-design refinement, replacing kicks, synths, and patches indefinitely instead of moving forward | Set a hard limit per sound (e.g. 3 kick drums to A/B, then commit) and build reusable templates to avoid re-deciding the same setup choices |
| Bands & Collaborative Projects | Sharing every stage across multiple people, often asynchronously | Keeping everyone aligned on the current version and decision-maker, not individual skill | Version confusion and unclear ownership (e.g. "which take is the keeper," "did we agree to cut the bridge") | Name one person as final decision-maker per stage and require everyone to check the latest file version before each session |
Adapting each stage to your goals, experience, and production style creates a more efficient process and makes it easier to finish and release music.
How to Improve Your Music Production Workflow
Create DAW Templates to Speed Up Production
Setting up a new project from scratch every time can interrupt creative momentum. A DAW template gives you a consistent starting point, so you can begin producing as soon as inspiration strikes.
Include elements you use in most projects, such as:
- Pre-routed audio and MIDI tracks
- Drum and instrument buses
- Common virtual instruments
- Effects sends
- Marker locations
- Recording inputs
- Color-coded track groups
A practical template might include 10-12 audio tracks, 8-10 MIDI tracks, drum and vocal buses, effects returns, markers, and routing already configured, so you can begin creating immediately.
Organize Sessions, Samples, and Project Files
A well-organized project is easier to edit, mix, revisit, and share with collaborators. Keeping files in a consistent structure also minimizes missing assets and duplicate versions. Organize every project into clearly labeled folders, such as:
- Project files
- Audio recordings
- MIDI files
- Samples
- Mix exports
- Masters
- Artwork
- Reference tracks
Applying the same folder structure to every project saves time and makes older sessions easier to navigate.
Use Consistent Naming, Markers, and Version Control
As projects become more complex, clear organization becomes just as important as the production itself. Consistent naming and version control make it easier to identify tracks, revisit earlier edits, and collaborate without confusion.
Good practices include:
- Use descriptive track names.
- Label song sections with markers.
- Save new versions after major changes.
- Include version numbers in project files.
- Back up sessions regularly.
Maintaining a clear version history allows you to experiment with confidence, knowing you can always return to an earlier project state if needed.
Separate Creative Work from Editing and Mixing
Writing, recording, editing, and mixing require different mindsets. Trying to complete all of them in the same session can interrupt creative flow and slow decision-making. Instead, dedicate each session to a specific objective.
For example, use one session for songwriting and arrangement, another for recording, and separate sessions for editing and mixing. Focusing on one stage at a time leads to more intentional creative and technical decisions.
Know When to Move to the Next Stage Instead of Chasing Perfection
Perfectionism is one of the biggest reasons music projects remain unfinished. Continuously adjusting sounds, rewriting sections, or revisiting completed stages can delay progress without improving the final result.
Instead of asking:
"Is this perfect?"
Ask:
"Does this accomplish the goal of this stage?"
Once the songwriting, arrangement, recording, or mix meets your creative goals, continue to the next step. A finished song creates more opportunities to learn than one that's endlessly revised.
Music Production Workflow Checklist
Before You Start a Project
Set up your project before recording or producing so you can focus on creating music instead of handling technical tasks later.
Checklist- Define the song's style and creative direction.
- Collect reference tracks.
- Choose the key and tempo.
- Create a project folder.
- Set up your DAW template.
- Prepare instruments, microphones, or MIDI controllers.
- Save an initial project version.
A few minutes of preparation can eliminate hours of rework later in the production process.
During Songwriting and Production
As the project develops, focus on completing one production stage before moving to the next.
Checklist- Finish the song structure.
- Finalize the arrangement.
- Select the instruments and sounds.
- Record scratch vocals or demos if needed.
- Organize tracks into groups or buses.
- Label tracks clearly.
- Save new project versions after major changes.
Before Mixing and Mastering
Confirm that all creative decisions have been made before beginning technical refinement.
Checklist- Complete all recordings.
- Finish editing and comping.
- Correct timing and pitch where needed.
- Remove unused tracks and plugins.
- Check gain staging.
- Select reference tracks.
- Create a backup of the project.
Before Releasing Your Music
Review your release package to ensure your music is ready for distribution and promotion.
Checklist- Final master exported.
- Metadata verified.
- Album artwork completed.
- Distribution scheduled.
- Promotional assets prepared.
- Social media content planned.
- Collaborators credited.
- Final listening check completed.
Taking the time to review these details minimizes last-minute surprises and keeps your release on schedule.
Ready to turn unfinished ideas into finished releases? Explore Yamaha Creator Pass and choose the plan that fits your workflow. Growth and Pro include LANDR AI Mastering and Distribution alongside music production tools to help take your track from creation to release.
Frequently Asked Questions
What is a typical order for music production?
While every producer works differently, a typical music production workflow follows these stages: inspiration, songwriting, arrangement, production, recording, editing, mixing, and mastering. Completing each stage before moving to the next creates a more organized workflow and reduces unnecessary revisions.
Can you mix while producing?
Yes, you can make basic mixing adjustments such as balancing levels or panning while producing. However, detailed mixing is generally more effective after the arrangement, recording, and editing stages are complete, as fewer creative changes are likely to affect the mix.
How long does a music production workflow take?
The time a complete music production workflow takes varies widely, from a couple of days for a simple beat to several months for a fully produced track, depending on the producer's experience, genre, and how much time they can dedicate each week.
Should beginners master their own music?
Yes. Self-mastering can help you build valuable skills in loudness, dynamics, and EQ. For important releases, a professional mastering can provide a noticeable improvement in overall song quality. Many producers do both: self-mastering for learning and flexibility, and professional mastering for major releases.
How do I know when my song is finished?
Your song is finished when it achieves the goal of its current production stage, and further changes will not make it better. Once additional tweaks no longer improve the overall listening experience, it's time to move to the mastering or releasing stage.