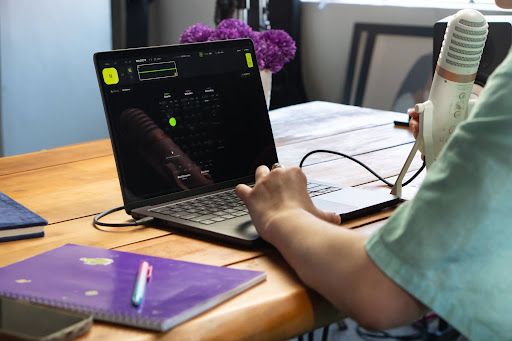
To record an acoustic guitar, you can use a microphone connected to an audio interface, record directly from an acoustic-electric guitar's pickup, or combine both signals. Recording quality depends on the instrument, microphone placement, room acoustics, input levels, and performance.
A simple recording setup can capture the guitar's natural sound without extensive studio equipment. This guide covers the equipment, recording steps, microphone techniques, common problems, and ways to improve your recording.
What You Need to Record Acoustic Guitar
You need a steel-string or nylon-string guitar, a microphone, an audio interface, a microphone stand and cable, headphones, a computer, and recording software to record acoustic guitar. You can also connect it through its pickup output.
The main equipment includes:
- Acoustic guitar: A steel-string or nylon-string guitar. Tuning, string condition, and playing technique affect the recorded sound.
- Microphone or guitar pickup: A microphone captures acoustic sound, while a pickup converts instrument vibrations into an electrical signal. Condenser microphones are common for detailed recordings, although dynamic microphones can also work well.
- Audio interface: An audio interface converts analog signals into digital audio for recording. USB microphones generally have built-in audio conversion and do not require a separate interface.
- Microphone stand and cable: A stand holds the microphone in position, while an XLR cable connects it to the interface. Direct pickup recording generally uses an instrument cable instead.
- Headphones or studio monitors: Closed-back headphones let you hear the recording without the sound leaking into the microphone. Studio monitors are useful for playback, but keep them turned down while the microphone is recording.
- Computer and digital audio workstation (DAW): Run the software used to record, edit, mix, and export audio.
- Second microphone (optional): Captures additional tonal detail or enables stereo recording. Simultaneous recording requires sufficient microphone inputs.
- Direct input (DI) box (optional): Connects a compatible pickup to a microphone input. A suitable high-impedance (Hi-Z) instrument input can often be used instead.
How to Record Acoustic Guitar Step by Step
For recording acoustic guitar, prepare the instrument and room, connect your equipment, configure your DAW, position the microphone, and set the input level. Then test the sound, record several takes, and select the best performance.
These steps use a single microphone, the simplest starting setup. You can adjust the order to suit your gear and project.
Step 1: Prepare Your Guitar and Recording Space
Before connecting your equipment, choose a quiet room with limited background noise and unwanted reflections. Turn off unnecessary fans and noisy equipment, and avoid placing the recording setup directly in a corner.
Rugs, curtains, and upholstered furniture can reduce some reflections. A completely acoustically dead room is not necessary.
Tune the guitar and check for string buzz, loose hardware, or other unwanted mechanical noises.
Step 2: Connect Your Gear
With the guitar and recording space prepared, connect the microphone to an XLR input on your audio interface. Then connect the interface to your computer. If your microphone requires phantom power, enable it according to the manufacturer's instructions.
Step 3: Set Up Your DAW
Now that the interface is connected, open your DAW, create an audio track, and select the interface input connected to the microphone.
Before recording, check these settings:
- Track type: Select a mono track for one microphone or separate tracks for multiple inputs.
- Recording format: Choose a bit depth and sample rate supported by your interface and suitable for your project. Higher bit depth allows greater dynamic range during recording.
- Monitoring: Turn on input monitoring or your interface's direct monitoring to hear yourself. A lower buffer size (the amount of audio your computer processes at once) reduces delay while recording.
- Click track: If the guitar will be part of a full song, record to a click or a guide track so other parts can line up with it later.
Step 4: Set the Microphone Position
With the DAW ready to receive audio, position the microphone near the guitar's 12th fret, pointing toward the fretboard.
Keep it clear of your playing hand and adjust its angle to capture the desired balance of string detail and body resonance.
Step 5: Set Your Recording Level
Once the microphone is positioned, play the loudest part of the song while watching your DAW's input meter. Adjust the interface's gain so the signal stays well below clipping.
Leave enough headroom to accommodate louder notes without reaching 0 dBFS, the maximum digital level.
Fingerpicked and nylon-string parts may have quieter output levels and require more gain. However, increasing the gain can also make background noise more noticeable, which is another reason to record in a quiet room.
Step 6: Record a Short Test
Record a short passage that includes every playing technique you plan to use. Listening back tells you more than the input meter can.
Listen through headphones for string clarity, body resonance, background noise, excess bass, and distortion. If something sounds off, move or angle the microphone and test again before changing any gear.
Step 7: Record Several Complete Takes
When the test sounds right, record complete performances. Keep the guitar and microphone in the same positions so the tone stays consistent between takes.
If you can, record all your takes in one session, since it's hard to put a microphone back in exactly the same spot later. Try alternative takes if different dynamics or playing styles might suit the song.
Step 8: Choose the Best Take
After recording, compare the takes for timing, tuning, tone, unwanted noise, and musical expression. Choose the performance that works best for the song. If necessary, combine suitable sections from different recordings using the DAW's editing tools, a process called comping. Save the project and retain the original recordings for later editing.
Choose How You Want to Record Your Guitar
The steps above describe a single-microphone setup, but you can adapt the same recording process to use two microphones or a direct pickup connection. Each method captures different characteristics of the instrument and offers different mixing options.
Record With One Microphone
A single microphone provides a focused recording without complicated equipment requirements. Its position determines how much string detail and body resonance it captures.
It also avoids the phase problems that can happen when you combine signals from several microphones. This method suits home recordings, demos, solo guitar parts, and arrangements that need a mono guitar track.
Record With Two Microphones
Two microphones let you capture different parts of the guitar and balance them when you mix. They aren't automatically better than one, though, because they add setup time and the risk of phase problems.
One approach positions a microphone near the neck for string articulation and another toward the body for additional resonance.
Another option is X/Y stereo recording, where two directional microphones have their capsules (the parts that pick up sound) positioned close together and aimed at different angles.
A common X/Y arrangement uses a 90-degree angle. Keeping the capsules close together reduces sound-arrival-time differences and generally improves mono compatibility compared with widely spaced microphones.
When combining signals, check for phase cancellation, which occurs when overlapping sound waves partially cancel and change the tone.
Record Direct From an Acoustic-Electric Guitar
If your guitar has a pickup, you can record its electrical output instead of using an external microphone.
Connect it to an instrument (Hi-Z) input on your interface with an instrument cable. Some pickup systems work better through a direct input (DI) box or preamp, which converts the signal so it can connect to a microphone input.
Direct recording picks up almost no room noise, but it sounds different from a microphone because the pickup captures string and body vibrations rather than the guitar's sound in the air. Some piezo pickups (a common type built into the bridge) can sound bright, with a pronounced pick attack.
You can also record the pickup and a microphone on separate tracks and blend them when you mix. The pickup signal arrives slightly earlier because sound takes time to travel through the air, so you may need to nudge the microphone track slightly to line them up.
Where Should You Place the Microphone?
Whichever microphone setup you choose, its position affects the balance between string articulation, body resonance, and room sound. The suitable placement depends on the guitar, microphone, playing technique, and desired tone.
Start Around the 12th Fret
Aim a single microphone at the 12th fret from approximately 6–12 inches (15–30 cm) away.
This often produces a balanced sound without emphasizing low frequencies as strongly as pointing directly at the soundhole.
Move the Microphone to Change the Tone
If the starting position does not produce the sound you want, changing the microphone's position or distance can alter its tonal characteristics:
| Microphone Position | What You May Hear |
|---|---|
| Toward the neck | More string detail and higher-frequency content |
| Around the 12th fret | Balanced string and body sound |
| Toward the soundhole | More bass, potentially an overly boomy tone |
| Toward the bridge | More pick attack; the tone can be brighter or warmer depending on the guitar and angle |
| Closer to the guitar | More direct sound, with possible bass increase from the proximity effect on directional microphones |
| Farther from the guitar | More room sound and natural ambience |
Should You Record Acoustic Guitar in Mono or Stereo?
Both mono and stereo can work well. The right choice depends on your recording method and the song.
- Mono recording captures one audio channel. It works well with a single microphone, a pickup signal, or a guitar part intended for a larger arrangement.
- Stereo recording uses left and right channels to capture width and spatial differences. It can suit solo performances or songs where the guitar is the main instrument.
Two microphones recorded onto separate mono tracks don't automatically create a stereo image. Their placement and panning decide the result, and an X/Y pair panned left and right is a common starting point.
For multi-microphone recordings, listen in mono to check whether combining the signals causes unwanted tonal changes.
How to Fix Common Acoustic Guitar Recording Problems
Even with good gear and placement, acoustic guitar recordings can run into problems with the room, the input level, or the way two signals combine. Check these causes before reaching for plug-ins.
| Recording Problem | Possible Cause | What to Try |
|---|---|---|
| Boomy or muddy sound | Microphone too close to the soundhole, or bass building up | Move the microphone toward the neck or change its angle |
| Thin or weak tone | Microphone placement or phase cancellation | Reposition the microphone and check combined signals |
| Boxy or hollow sound | Strong room reflections | Change the recording position or add suitable absorption |
| Background hiss or noise | Environmental noise, high gain, or noisy equipment | Reduce the noise source and check the input chain |
| Distortion or clipping | Excessive input level | Lower the gain and record another take |
| Loss of tone with two microphones | Phase cancellation | Check in mono and adjust microphone positions |
| Monitoring delay | Audio latency | Use direct monitoring or adjust the audio buffer settings |
How to Make Your Acoustic Guitar Sound Better After Recording
Once the recording is clean, editing, EQ, compression, and reverb can help it sit well in the song. How much you need depends on the recording and its role in the mix.
Clean and Edit the Recording
Begin by removing unwanted noise from unused sections and applying short fades around edits where necessary to prevent clicks.
Check transitions between combined takes and correct distracting timing problems. Natural string and finger noises are part of a natural performance and don't always need removing.
Use EQ to Balance the Tone
Once the recording is edited, EQ can help adjust its frequency balance.
Common adjustments include:
- High-pass filtering: Reduces low-frequency rumble the guitar doesn't need.
- Low-midrange: Can reduce excessive warmth or muddiness. The 200–400 Hz range is one area worth checking when the guitar sounds cloudy.
- Upper frequencies: A small cut can soften harsh pick sounds, and a small boost can add clarity.
Control Dynamics With Compression
Compression reduces volume peaks once the signal goes above a set threshold.
Gentle compression can even out uneven playing, while heavy compression can flatten the natural contrast between soft fingerpicking and strong strumming. The attack and release settings control how quickly the compressor responds and recovers.
Add Space With Reverb
Reverb can add or enhance a sense of acoustic space once the guitar's tone and dynamics are balanced. A small amount can help a dry guitar recording blend with other instruments. Recordings with noticeable room ambience may need less additional reverb.
Turn Your Acoustic Guitar Recording Into a Song With Yamaha Creator Pass
Take your acoustic guitar recording from a raw take to a finished track with Yamaha Creator Pass. The Growth and Pro Passes include Cubase 15 AI for music production, Output Arcade for samples and sounds, and LANDR for mastering and distribution. LANDR Distribution and Groover credits available once your paid subscription begins.
Start your 7-day free trial of Yamaha Creator Pass to explore the available tools and find the right plan for your music production workflow.
Frequently Asked Questions
What is the best way to record an acoustic guitar?
A single microphone about 6–12 inches from the guitar, aimed near the 12th fret, is a practical starting point for most home recordings. However, the best method depends on your room, equipment, and the sound you want. Recording the pickup directly gives more isolation in a noisy room.
Where should I place a microphone to record acoustic guitar?
Place the microphone near the 12th fret to capture a balance of string detail and body resonance. Moving it toward the neck or soundhole changes the tonal balance, depending on the instrument and microphone.
Should I point the microphone at the soundhole?
Pointing a microphone directly at the soundhole can emphasize low frequencies and make the recording sound boomy. Positioning it closer to the fretboard often provides more string detail and a different balance of body resonance.
How far should a microphone be from an acoustic guitar?
A starting distance of 6–12 inches is common for acoustic guitar recording. Closer positions capture more direct sound, while greater distances capture more room ambience. The ideal distance depends on the microphone and recording environment.
Can I record an acoustic guitar with one microphone?
Yes, one microphone can capture a balanced acoustic guitar recording. Its position affects the balance of strings and body resonance, and a single-microphone setup avoids phase cancellation caused by combining signals from multiple microphones.
Should I record an acoustic guitar in mono or stereo?
Mono recording works well for focused guitar parts and single-microphone setups. Stereo recording can provide greater width and ambience, particularly for solo performances. The choice depends on the arrangement, recording method, and intended sound.