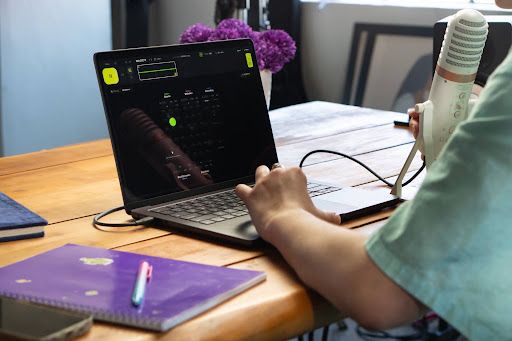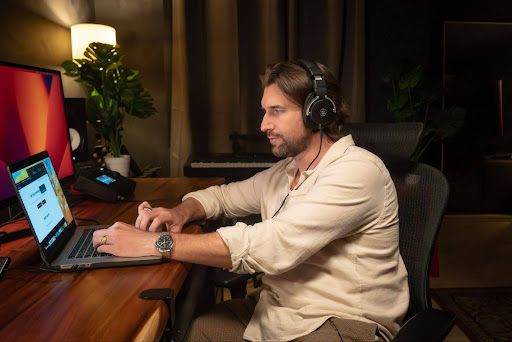
Music production typically includes ideation, songwriting, arrangement, recording, editing, mixing, mastering, and distribution. Each stage has a different goal, and missing a critical task can lead to avoidable revisions later.
A music production checklist turns these stages into clear, actionable steps. It gives producers a simple way to verify performances, session organization, mix quality, export settings, and release assets before moving to the next stage.
This guide will break down each stage with practical checklists, benchmarks, common mistakes, and workflow tips that artists can use to stay organized and complete each stage with confidence.
Complete Music Production Checklist
| Stage | Goal |
|---|---|
| Planning | Define the project |
| Composition | Write the song |
| Sound Selection | Build the sonic palette |
| Arrangement | Finish the structure |
| Recording | Capture performances |
| Editing | Clean and prepare tracks |
| Mixing | Balance and enhance |
| Mastering | Prepare for release |
| Quality Control | Test everywhere |
| Release | Distribute music |
| Promotion | Market the release |
Stage 1: Planning Checklist
Goal: Start with a clear creative direction before opening your DAW.A strong production begins long before recording starts. Defining your creative vision early can prevent unnecessary revisions and help every production decision support the same goal.
Checklist
- Define the purpose of the song: Know what you want the track to communicate. Is it meant for streaming, sync licensing, social media, or a live performance?
- Select genre and mood: Choose a musical style and emotional direction. This influences instrumentation, arrangement, and production choices throughout the project.
- Choose BPM: Pick a tempo that complements the energy of your song and remains comfortable for the performers.
- Choose musical key: Select a key that supports the melody, harmonies, and vocal range before writing the full arrangement.
- Select 2–3 reference tracks: Use professionally released songs as references for arrangement, tone, mix balance, and overall production quality.
- Create a project folder: Organize audio files, exports, stems, artwork, and project versions in one location from the beginning.
- Organize samples: Sort your drum samples, loops, presets, and virtual instruments before production starts to avoid interrupting your creative flow.
- Open your production template: Starting with a template that already includes routing, buses, favorite plugins, and organization can save valuable production time.
Common Mistakes
- Starting without reference tracks
- Working with unorganized project files
- Constantly changing the creative direction midway through production
Stage 2: Composition Checklist
Goal: Build the musical foundation.Composition is where ideas become songs. Before focusing on production techniques, ensure the songwriting is strong enough to stand on its own.
Songwriting
- Main hook: Create a memorable musical or lyrical idea that listeners will remember after the song ends.
- Chord progression: Build chord progressions that reinforce the emotion and support the melody naturally.
- Melody: Develop melodies that are easy to follow while remaining distinctive and expressive.
- Bassline: Write bass parts that strengthen both the rhythm and harmonic movement of the track.
- Lyrics (if applicable): Ensure every lyric supports the story or emotion without unnecessary repetition.
Song Structure
- Intro: Create an introduction that establishes the mood and prepares listeners for the main section.
- Verse: Develop the narrative while gradually building anticipation.
- Chorus: In most song structures, this is where the strongest melodic and emotional moment lands.
- Bridge: Introduce contrast before returning to the final chorus or ending.
- Outro: Finish the song naturally without making the ending feel abrupt.
Musical Interest
- Dynamic changes: Create variation in volume, instrumentation, and intensity throughout the song.
- Tension and release: Build anticipation before important sections so transitions feel satisfying.
- Memorable moments: Add distinctive production elements, rhythmic ideas, or melodic phrases that help the song stand out.
Stage 3: Sound Selection Checklist
Goal: Create a cohesive sound before mixing begins.Choosing the right sounds early reduces the need for heavy EQ and corrective processing later. Strong sound selection often leads to cleaner mixes with less effort.
Checklist
- Select drum samples: Choose kicks, snares, hi-hats, and percussion that naturally complement each other rather than competing for space.
- Choose synths and instruments: Select instruments that support the genre and emotional direction established during planning.
- Layer sounds intentionally: Combine layers only when each contributes something unique, such as additional texture, width, or character.
- Replace weak sounds: If an instrument isn't working, replace it instead of trying to fix it with excessive processing.
- Remove redundant layers: Delete sounds that don't add meaningful value to the arrangement or mix.
- Save custom presets: Save successful sound combinations for future projects to maintain consistency and improve workflow efficiency.
Quality Checks
Before moving to arrangement, ask yourself:
- Do all the sounds work well together?
- Does every layer have a clear purpose?
- Are there obvious frequency conflicts that should be addressed before mixing?
Stage 4: Arrangement Checklist
Goal: Turn an idea into a finished song.Arrangement determines how your song evolves from beginning to end. A well-arranged track maintains momentum, creates contrast, and guides listeners through a satisfying musical journey.
Structure
- Sections flow naturally: Review the transition between every section. Each verse, chorus, bridge, and outro should feel connected without abrupt changes.
- Proper transitions: Use fills, reverse effects, risers, impacts, or automation to create smooth movement between sections.
- Automation completed: Automate volume, effects, filters, and panning where needed to add movement and prevent static mixes.
- Fills and risers added: Introduce drum fills, transitions, or ear-catching effects before major song sections to build anticipation.
Listener Engagement
- Introduce variation regularly: This could be a new instrument, percussion layer, automation change, or rhythmic variation that keeps the arrangement engaging.
- Energy builds naturally: Increase intensity gradually instead of introducing every element at once.
- No repetitive sections: Listen for repeated loops that continue longer than necessary and remove or modify them.
- Clear climax: Identify the emotional peak of the song and ensure the arrangement builds toward it effectively.
A solid arrangement can prevent many production problems before mixing begins. If the arrangement is boring, no amount of mixing and mastering will save it.
Stage 5: Recording Checklist
Goal: Capture performances that require minimal correction later.High-quality recordings make editing and mixing significantly easier. Spending extra time preparing before recording usually saves hours during post-production.
Before Recording
- Finalize arrangement: Avoid making major structural changes while recording. Record only after the arrangement is complete.
- Set BPM: Confirm the project tempo so every recording stays synchronized.
- Prepare click track: Use a click or guide track to maintain consistent timing throughout the session.
- Tune instruments: Check tuning before every take, especially for guitars, basses, and acoustic instruments.
- Warm up vocals: Allow vocalists enough time to warm up before recording important takes.
During Recording
- Record multiple takes: Capture several performances instead of relying on a single take. Multiple options make comping much easier later.
- Monitor clipping: Watch input levels carefully to avoid digital distortion while maintaining healthy recording levels.
- Capture clean performances: Minimize background noise, room reflections, and unwanted distractions before pressing record.
- Label tracks correctly: Use descriptive track names while recording to simplify editing and mixing.
After Recording
- Backup the project: Save your project in multiple locations immediately after recording.
- Save alternate takes: Keep alternate performances even if you don't plan to use them immediately.
- Organize folders: Separate recordings, edits, stems, and exports into clearly labeled folders.
For creators using Ableton Live, Yamaha Creator Pass includes access to Ableton Live 12 Lite with annual Growth and Pro Pass through Yamaha-managed subscription.
Stage 6: Editing Checklist
Goal: Prepare every track before mixing.Editing removes distractions and creates a clean session that allows mixing decisions to focus on creativity instead of problem-solving.
Audio Cleanup
- Remove clicks: Listen closely for digital clicks and unwanted artifacts throughout the session.
- Remove pops: Clean vocal plosives, breaths, and other unwanted noises where necessary.
- Fade edits: Apply short fades to every edit point to eliminate unwanted clicks.
- Tighten timing: Align performances without removing their natural feel.
Session Cleanup
- Name tracks: Ensure every track has a descriptive name before mixing begins.
- Color-code channels: Group similar instruments using consistent colors for faster navigation.
- Organize buses: Route related instruments into buses for easier processing and automation.
- Remove unused tracks: Delete muted or unused tracks that no longer contribute to the project.
Performance
- Tune vocals: Apply pitch correction only where necessary while preserving natural expression.
- Edit timing: Adjust timing inconsistencies that distract from the groove.
- Replace poor takes: Swap weak performances with alternate takes whenever possible instead of relying solely on editing tools.
- Check phase: Verify phase alignment on multi-microphone recordings such as drums, guitars, or layered instruments.
Final Editing Check
Before opening your mixing session, confirm that:
- Every track is labeled clearly.
- Timing issues have been corrected.
- Unwanted noises have been removed.
- The session is organized and easy to navigate.
Stage 7: Mixing Checklist
Goal: Balance every element so the song sounds clear, cohesive, and translates well across different playback systems.Mixing is where individual tracks become a polished production. Focus on creating balance before adding processing. A simple, well-balanced mix often sounds better than one with excessive plugins.
Balance
- Gain staging: Set appropriate input levels before applying EQ, compression, or effects. Maintaining consistent headroom throughout the mix prevents unwanted distortion and gives processing more room to work.
- Fader balance: Build your mix using volume. Adjust each instrument until every important element can be heard clearly without relying on plugins.
- Panning: Position instruments across the stereo field to create width while leaving space for key elements like vocals, kick, bass, and snare.
- Headroom: A commonly recommended range is 3–6 dB of headroom on the master bus for mastering. Avoid pushing the mix to maximum loudness during this stage.
EQ
- Remove mud: Identify frequencies that cause the mix to sound cloudy and reduce them carefully instead of making aggressive cuts.
- High-pass unnecessary lows: Apply high-pass filters to tracks that don't require low-end information.
- Resolve masking: When multiple instruments compete for the same frequency range, use EQ or arrangement adjustments so each element remains audible.
Dynamics
- Compression: Control dynamics while preserving the natural energy of each performance.
- Sidechain: Apply sidechain compression where appropriate to create separation between competing elements, especially kick and bass.
- Parallel processing: Blend compressed and unprocessed signals to increase punch without sacrificing dynamics.
Effects
- Reverb: Create depth without pushing important instruments too far back in the mix.
- Delay: Use delay to add movement, space, or rhythmic interest without overcrowding the arrangement.
- Saturation: Introduce subtle harmonic richness where needed rather than applying heavy distortion across multiple tracks.
- Automation: Automate levels, effects, and processing to keep the mix dynamic from beginning to end.
Stereo Image
- Mono compatibility: Check your mix in mono to identify phase issues and ensure important elements remain clear.
- Stereo width: Create width intentionally instead of widening every instrument.
- Phase alignment: Verify that layered instruments and stereo recordings remain phase coherent.
Reference Checks
- Compare with commercial tracks: Compare your mix with 1–2 professionally mastered reference tracks in a similar genre for balance, tone, and dynamics.
- Loudness comparison: Match playback volume before comparing reference tracks to avoid being influenced by perceived loudness.
- Translation across speakers: Test your mix on multiple playback systems before moving to mastering.
Stage 8: Mastering Checklist
Goal: Prepare a release-ready master.Mastering is the final step before releasing your music. It enhances your finished mix and creates consistent playback across different listening systems. A good master preserves the mix’s emotion while delivering a polished, professional sound.
Processing
- Final EQ: Make subtle tonal adjustments that improve overall balance without dramatically changing the mix.
- Glue compression: Apply gentle bus compression to create a cohesive sound while preserving dynamics.
- Limiting: Increase overall loudness carefully while preventing clipping and distortion.
- Stereo enhancement: Make conservative stereo adjustments that improve width without introducing phase issues.
Export
- Dithering: Apply dithering when reducing bit depth for final delivery formats.
- WAV export: Export a high-quality WAV master for streaming platforms, distributors, and archival purposes.
- MP3 export: Create high-quality MP3 versions for previews, demos, or promotional use when needed.
- Sample rate: Use the sample rate required by the intended delivery format; 44.1 kHz is common for music, while 48 kHz is common for video projects.
- Bit depth: Export the highest-quality native master your distributor accepts. If your master is 24-bit, keep it at 24-bit rather than reducing it to 16-bit solely for streaming.
Technical Checks
- Loudness target: Check your master’s loudness and true-peak levels, and understand how your target platforms apply loudness normalization. Avoid treating a platform’s playback normalization level as a required mastering target.
- No clipping: Listen carefully from beginning to end to ensure no digital clipping occurs.
- Metadata: Add song title, artist information, album details, and other required metadata before distribution.
- Start and end fade: Check that the beginning and ending of the song sound natural without abrupt cuts.
Yamaha Creator Pass includes LANDR AI-assisted mastering in Growth or Pro Pass, which analyzes your mix and applies EQ, compression, and loudness adjustments automatically. It's a smart way to get a release-ready master that you can still fine-tune to taste.
Stage 9: Final Quality Control Checklist
Goal: Confirm the song performs well across every listening environment before release.Even an excellent mix can reveal issues on different playback systems. A final quality control review catches small problems before listeners hear them.
Listen On
- Studio monitors: Use your primary monitoring system to evaluate overall balance and detail.
- Headphones: Check for clicks, noise, stereo imaging issues, and subtle editing mistakes.
- Earbuds: Ensure vocals, drums, and bass remain clear on consumer listening devices.
- Car speakers: Evaluate how the mix performs in a common real-world environment.
- Phone speaker: Confirm that important musical elements remain audible on small speakers.
- Bluetooth speaker: Check overall translation on portable consumer playback systems.
Final Review
- Mono check: Verify that essential instruments remain balanced when summed to mono.
- Fresh ears check: Take a break before performing your final listening session to make more objective decisions.
- Reference track comparison: Compare your finished master against commercial releases in the same genre.
- Check transitions: Listen carefully to every transition, fade, and automation move from start to finish.
- Check automation: Confirm that volume rides, effects, and movement occur exactly as intended.
- Confirm emotional impact: Play the finished track for someone unfamiliar with the project and ask what they feel. Technical quality matters, but the song should also land the emotion you intended when you started the project.
Stage 10: Music Release Checklist
Goal: Prepare your music for distribution and ensure everything is ready before release day.Finishing a song is only part of the process. A successful release depends on accurate metadata, complete assets, and a well-planned launch. Taking time to prepare before publishing minimizes last-minute issues and creates a better experience for listeners.
Distribution
- Export final files: Create your final master in the required formats. Keep both high-resolution WAV files and compressed versions for promotional use.
- Upload to your distributor: Submit your release to your digital music distributor well before your planned release date to allow enough time for processing.
- Confirm ISRC codes: If a track has been released before, verify and reuse its existing ISRC. For a new release, your distributor can assign one—LANDR automatically generates ISRC and UPC codes at no additional cost.
- Review metadata: Double-check the song title, artist name, featured artists, songwriter credits, genre, and release information for accuracy.
- Add lyrics: Upload synchronized or standard lyrics where supported to improve the listening experience and accessibility.
Release Assets
- Final artwork: Ensure your cover artwork meets your distributor's size and format requirements.
- Canvas or visualizer: Prepare short looping visuals or animations for platforms that support them.
- Promotional images: Create images for social media announcements, streaming platforms, and press materials.
- Press photos: Update artist photos that accurately represent your current brand and release.
Streaming Preparation
- Update artist profiles: Review your profiles across streaming platforms to ensure biographies, photos, and links are current.
- Schedule the release: Choose a release date that gives you enough time to promote the song beforehand.
- Set up a pre-save campaign: Launch a pre-save campaign early to build anticipation and collect listeners before release day.
Stage 11: Music Promotion Checklist
Goal: Give your music the best opportunity to reach new listeners after release.Promotion doesn't begin on release day. It starts well before your song goes live. Planning content and outreach helps maintain momentum before, during, and after launch.
Before Release (2–4 Weeks Out)
- Build a content calendar: Plan your promotional posts, videos, announcements, and behind-the-scenes content several weeks before release.
- Prepare your email list: Notify subscribers about your upcoming release and encourage them to pre-save or follow your artist profile.
- Press outreach: Contact music blogs, journalists, local media, and content creators that cover your genre.
- Playlist pitching: Submit your song to editorial opportunities and independent playlist curators before release whenever possible.
Release Day
- Publish across social media: Share your release across all relevant platforms with consistent messaging and visuals.
- Upload to YouTube: Publish your official audio, lyric video, visualizer, or music video to reach additional audiences.
- Send your newsletter: Announce the release to your email subscribers with direct streaming links.
- Engage with your community: Respond to comments, thank listeners, and encourage sharing to build momentum during launch.
After Release (1–2 Weeks Post)
Create short-form videos: Repurpose your song into clips for platforms like TikTok, Instagram Reels, and YouTube Shorts.
- Engage with fans: Reply to messages, comments, and user-generated content to strengthen your audience relationship.
- Track performance: Monitor streaming data, audience growth, saves, playlist additions, and engagement metrics to understand what worked.
- Repurpose content: Turn one release into multiple pieces of content, including tutorials, studio sessions, behind-the-scenes videos, live performances, and interviews.
Use Yamaha Creator Pass's Groover credits (included in Growth and Pro tiers) to pitch your track to playlist curators, press, and influencers. Groover connects independent artists directly to industry pros who can add you to playlists or feature your music.
Music Production Checklist by Experience Level
Different producers face different challenges. While the overall workflow remains the same, your priorities will evolve as your skills grow.
Checklist for Beginner
Focus on building strong habits and completing full projects.
- Finish every song you start.
- Learn basic song arrangement.
- Record clean performances.
- Create balanced mixes using volume and panning.
- Export your music correctly for sharing.
Getting started with music production? Yamaha Creator Pass includes Output Creator for songwriting and idea generation, plus 15+ partner discounts to help you expand your production toolkit as your skills grow.
Checklist for Intermediate
You've finished a few tracks. Now refine your production quality and consistency.
- Refine sound selection.
- Develop more dynamic arrangements.
- Improve mix translation across different speakers.
- Learn mastering fundamentals.
- Build repeatable production templates.
Checklist for Advanced
Focus on efficiency, consistency, and professional workflows.
- Optimize your production workflow.
- Mix using professional reference tracks.
- Fine-tune loudness without sacrificing dynamics.
- Standardize your release process.
- Review completed projects to identify workflow improvements.
Ready to streamline your production workflow?
Yamaha Creator Pass brings curated tools for creation, learning, mastering, distribution, and promotion together under one Yamaha Creator ID and subscription. Start a free 7-day trial of the Creator Pass to try songwriting, sound, and mixing tools firsthand (LANDR distribution and Groover credits become available once your paid subscription starts).
Frequently Asked Questions
What is a music production checklist?
A music production checklist is a step-by-step guide covering every stage from initial song concept through final release. It helps you stay organized, maintain a consistent workflow, and avoid missing important tasks during production.
Why should producers use checklists?
Checklists eliminate decision fatigue and guesswork. Instead of asking "What do I do in this stage?", you follow the checklist. This saves time, reduces mistakes, and lets you focus on creativity instead of logistics.
When should I use a music production checklist?
Use a music production checklist from the moment you begin planning a song until after it has been released. Following the checklist throughout the entire production process makes it easier to track progress, stay focused, and complete projects without skipping essential steps.
Can beginners use this checklist?
Yes. This checklist is suitable for producers at every experience level. Beginners can use it to learn a structured workflow, while experienced producers can adapt it to match their own production process and maintain consistency across projects.
Can I customize a music production checklist?
Absolutely. Every producer has a unique workflow, so you can add, remove, or rearrange tasks to fit your genre, production style, or preferred tools. The checklist works best when it reflects your own creative process while still covering the essential stages of music production.
Is there a printable music production checklist?
Yes. You can download the checklist as a printable PDF for studio use or use the Google Sheets version to track progress digitally. A printable version makes it easy to review tasks while recording, mixing, or preparing a release.
How often should I update my checklist?
Review your checklist after every completed project. As your skills improve and your workflow evolves, update the checklist to include new techniques, production tools, quality checks, or release tasks that make your process more efficient.