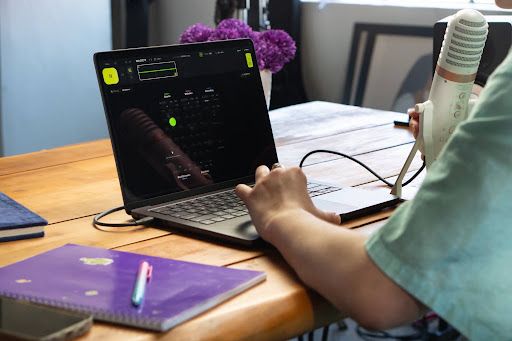
Music production is the process of turning a musical idea into a finished, polished track that is ready for listeners. For beginners, it usually involves choosing a digital audio workstation (DAW), building a track from drums, bass, chords, and melody, arranging it into a song, then recording, mixing, mastering, and exporting it. These stages often overlap and don't have to follow one fixed order.
This beginner guide to music production covers songwriting, sound selection, recording, MIDI programming, editing, arranging, mixing, mastering, and exporting.
What Is Music Production?
Music production is everything that happens between a musical idea and a finished recording. It blends creative decisions, like writing and arranging, with technical work, like recording, editing, and mixing.
The main music production basics include:
- Ideation: Sketching the first spark of a track, such as a beat, chord progression, melody, sample, or mood, and choosing the sounds that fit it.
- Songwriting: Developing that idea into melodies, chords, rhythm, and lyrics.
- Arrangement: Organizing the song into sections and deciding which instruments and parts play when.
- Recording: Capturing vocals and instruments as audio, or playing and programming parts as MIDI for virtual instruments.
- Editing: Cleaning up and refining takes, including comping, trimming, fades, and timing or pitch corrections.
- Mixing: Balancing individual tracks and shaping how they sound together.
- Mastering: Preparing the finished mix for playback across different systems and platforms.
- Distribution & Release: Delivering the final track to streaming platforms and stores, usually through a digital distributor, and sharing it with listeners.
These music production basics often overlap. Many producers write while arranging or edit while mixing, and the order can change depending on the producer, genre, and project.
What Does a Music Producer Do?
A music producer helps guide the musical direction of a recording and makes or coordinates the decisions needed to finish it. The exact role can change depending on the artist, genre, project, and production setup. A producer’s role can include:
- Creative direction: A producer may help develop the arrangement, select instruments and sounds, discuss performances, or decide how a song should build and change.
- Technical work: In a self-produced project, the producer may record audio, program MIDI, edit performances, route signals, use plug-ins, create a mix, and prepare files for mastering.
- Project management: Larger productions can also involve coordinating musicians, recording sessions, files, revisions, and other people involved in completing the project.
In a home or self-produced setup, one person may handle creative direction, technical production, and project management.
Mastering does not necessarily have to be handled by the producer. It can be completed by the producer, a mastering engineer, or an appropriate mastering service depending on the project.
What Do You Need to Start Making Music?
A beginner music production setup needs a computer, a digital audio workstation (DAW), and headphones or speakers. A MIDI keyboard, audio interface, microphone, and other hardware become useful when your workflow requires them.
Choose a DAW for Music Production
Your DAW acts as the main workspace for building a track. It can contain audio tracks, MIDI tracks, virtual instruments, samples, effects, a mixer, automation, and an arrangement timeline.
Audio and MIDI perform different jobs inside the DAW. Audio contains recorded or imported sound. MIDI contains musical and control information that compatible software or hardware can interpret.
When choosing a DAW for music production, consider:
- Operating-system compatibility
- Audio and MIDI workflow
- Included instruments and effects
- Third-party plug-in support
- Hardware compatibility
- Project requirements and budget
Choose Headphones or Studio Monitors
Headphones and studio monitors both help you hear production and mix decisions, but they present sound differently.
- Closed-back headphones: Offer good isolation and less microphone bleed, which makes them useful for recording.
- Open-back headphones: Can sound more open and natural for detailed listening, but they leak sound and are not ideal near an active microphone.
- Studio monitors: Give a speaker-based stereo image and help judge how a mix works in a room, but placement and room acoustics affect what you hear.
Add a MIDI Keyboard, Audio Interface, or Microphone When Needed
Additional hardware such as a MIDI keyboard, audio interface, or microphone becomes useful when your music requires a specific way to play, record, or connect equipment.
- MIDI keyboard: A MIDI keyboard sends MIDI data such as note information, velocity, and control messages. The DAW records when those messages occur. Most MIDI keyboards connect to a computer over USB, while some also offer other MIDI connections.
- Audio interface: An audio interface can connect microphones and electric instruments with compatible outputs to a computer. It is not required for every setup because a USB microphone or built-in microphone can record without one. An interface can provide lower-latency monitoring, better audio quality than basic built-in audio, and more flexible input and output connections.
- Microphone: A microphone captures vocals, acoustic instruments, and other sounds. XLR microphones normally connect through an audio interface, while USB microphones can connect directly to a computer.
How to Make Your First Music Track as a Beginner
You can make your first track by starting with one clear musical idea, developing supporting parts, and arranging them into a complete piece. The starting point does not have to be the same for every track. It can depend on the genre, idea, and way you prefer to work.
Start With a Musical Idea
Start with one clear idea, such as a drum pattern, chord progression, bass line, melody, or sample. A short loop can help you test the idea before developing the full track. Keep the first version simple and focus on whether the rhythm, harmony, or melody works.
Build the Beat, Bass, and Chords
Beat, bass, and chords can create the rhythmic and harmonic foundation of a track.
- Beat: Choose drums and percussion, then build a pattern that fits the genre and groove.
- Chords: Create a progression that supports the mood and melody.
- Bass: Use notes that support both the chords and rhythm. Root notes are a simple starting point, while octaves, rests, and passing notes can add movement.
Add Melodies, Samples, and Instruments
Add sounds that provide melody, texture, or contrast. MIDI is useful for virtual instruments because the notes remain editable. In a DAW’s MIDI editor, often called a piano roll, you can edit note pitch, timing, length, and velocity.
Audio samples contain recorded sound and can be trimmed, faded, time-stretched, or pitch-shifted. Check the sample’s tempo and key when relevant.
Arrange Your Ideas Into a Song Structure
Arrange the parts into sections such as an intro, verse, chorus, bridge, or breakdown. Create contrast by adding or removing instruments, changing rhythm or register, or using automation.
How to Record and Edit Your Track
Record the performances you need, then edit them so they fit the production while keeping the musical character you want.
Record Vocals or Live Instruments
When using an audio interface, a typical signal path is microphone → audio interface → DAW for vocals and acoustic sources, or compatible instrument output → audio interface → DAW for electric instruments.
Match the source to the correct mic, line, or Hi-Z (a high-impedance instrument input used for sources such as passive electric guitar or bass pickups) instrument input, and set the gain so the signal does not clip. Closed-back headphones can reduce microphone bleed, while direct monitoring lets you hear the incoming signal without routing it through the DAW first.
Edit and Clean Up Your Recordings
Choose the best takes, trim unwanted audio, and correct timing or pitch where needed. Comping combines the strongest sections from several takes into one performance, while short fades at edit points can reduce clicks or abrupt transitions. Avoid excessive noise reduction because it can create audible artifacts.
Refine the Arrangement and Transitions
Improve section changes with fills, pauses, automation, instrumentation changes, or reverb and delay tails. Removing unnecessary parts can also create stronger contrast.
How to Mix Your Music
Mix your music by balancing the separate tracks and shaping how they work together as one complete mix. Start with the relationship between the tracks before adding processing simply because a plug-in is available.
The main mixing controls include:
- Level and gain: Set useful signal levels and build a clear fader balance without overloading the output.
- Panning: Position appropriate elements within the stereo field. Check the mix in mono, where the left and right channels are combined, to make sure important sounds remain clear.
- EQ: Adjust frequency balance when a sound needs tonal changes or when masking occurs, where sounds occupying similar frequency areas make one another harder to hear.
- Compression: Control or reshape dynamics, meaning the differences between quieter and louder parts of a sound. Compression does not have to be used on every track.
- Reverb and delay: Add depth, space, ambience, or rhythmic repeats while keeping important sounds intelligible.
- Automation: Change levels, panning, effects, sends, and other parameters over time so the mix can respond to the arrangement.
Check the mix through more than one listening system when possible. Headphones and speakers reveal different aspects of the stereo image and room interaction.
How to Master and Export Your Track
Master and export your track by preparing the finished mix for its final listening or delivery format. Mastering can adjust overall tone, dynamics, level, stereo characteristics, and final presentation. It works best when major recording, arrangement, and mixing problems have already been addressed.
Prepare Your Mix for Mastering
Export a clean mix without unintended clipping. Master-bus EQ, compression, saturation, or other processing can remain if it is an intentional part of the sound. If someone else will master the track, check their file requirements before exporting.
Master Your Finished Track
Mastering usually works on the complete stereo mix. Depending on the track, it may involve EQ, compression, limiting, stereo processing, level adjustment, and final quality checks.
There are different ways to master a finished track:
- Self-mastering: Gives the producer direct control and can suit projects where they want to handle the full production process themselves.
- Mastering engineer: Provides specialist monitoring, mastering experience, and a fresh perspective on the mix.
- Online mastering service: Offers a fast, affordable way to master a track, with results in minutes.
Export Your Final Audio
Choose the export settings based on where the finished file is going next. WAV is a common uncompressed audio format for mastering, archiving, and final delivery. MP3 creates a smaller compressed file and can be useful for quick previews or sharing when a lossless master is not required.
When exporting WAV or AIFF files, your DAW lets you choose both the sample rate and bit depth of the exported file. Dither is not required for every export. It is mainly relevant when reducing audio to a lower bit depth, where it helps reduce audible effects from quantization.
Common Music Production Mistakes to Avoid
Common music production mistakes include adding too many layers, using processing before fixing the source, recording too hot, mixing only in solo, changing every stage at once, and not finishing a song. These problems can make a track harder to arrange, mix, and finish.
These mistakes include:
- Adding too many layers: Extra tracks can mask important musical parts instead of making the production larger.
- Using processing before fixing the source: Check the performance, sound choice, arrangement, and recording before trying to solve every problem with plug-ins.
- Recording too hot: Leave enough input margin for performance peaks so the recorded signal does not clip.
- Mixing only in solo: Solo helps inspect a sound, but most balance and processing decisions need to work in the full mix.
- Changing every stage at once: Production stages can overlap, but separating a writing problem from a recording, arrangement, or mixing problem often makes the next decision clearer.
- Never finishing tracks: Constantly restarting or endlessly revising projects can limit the experience you gain from arranging, mixing, mastering, and completing a full production.
How to Improve Your Music Production Skills
Music production skills improve when technical learning is applied to finished projects. Learn what a tool changes, listen for that change, and decide whether it improves the track.
Spend time developing critical listening, DAW knowledge, recording technique, MIDI editing, arrangement, and basic signal flow. Reference professionally released music when learning balance and structure, but use it as a comparison rather than a template that every track has to copy.
Bring Your First Track to Life With Yamaha Creator Pass
Ready to take your first track from idea to release? Subscribe to Yamaha Creator Growth Pass and get access to Cubase 15 AI, Ableton Live 12 Lite (with yearly plan), 80,000+ samples from LANDR and Output Arcade, AI mastering and distribution with LANDR, and Groover credits to pitch your finished track.
Start your 7-day free trial and explore the tools you need to create, refine, and release your music.
Frequently Asked Questions
Can I learn music production without knowing music theory?
Music production can be learned without formal music theory. A DAW lets beginners work with audio, MIDI, samples, and virtual instruments, while basic knowledge of rhythm, scales, chords, and harmony can gradually make musical decisions easier.
What is the easiest DAW for a beginner?
The easiest DAW depends on the beginner's operating system, workflow, music style, budget, and hardware. Look for software that feels understandable, runs reliably, provides the tools you need, and supports the plug-ins and equipment you plan to use.
Can I start music production with just a computer and headphones?
A computer, DAW, and headphones can be enough to start music production. This setup supports MIDI programming, virtual instruments, samples, arrangement, editing, mixing, and exporting without requiring a microphone, MIDI keyboard, or audio interface immediately.
How much does it cost to start music production?
The cost depends on the computer, DAW, monitoring, and recording gear you need. If you already own a computer and headphones, free or entry-level DAW editions can keep your starting cost low, and microphones, interfaces, controllers, monitors, and extra software can be added as your music calls for them.
What is the best way to learn music production?
A practical way to learn music production is to combine focused technical learning with finished tracks. Practice one concept inside a real project, compare the result with reference tracks, identify what changed, and carry that lesson into the next production.