Recording vocals in Ableton starts with more than simply connecting a microphone and pressing record. It requires the right microphone connection, audio settings, input routing, and monitoring setup. A clean recording also depends on setting appropriate input levels and keeping latency under control.
This guide explains how to record vocals in Ableton and prepare your recordings for editing and mixing.
Preparing to Record Vocals
Before starting an Ableton vocal recording, prepare your microphone, audio interface, headphones, and a computer running Ableton Live.
Before recording:
- Connect the microphone to the appropriate input on your audio interface.
- Connect headphones or studio monitors to the interface.
- Open Ableton Live and create or open the Live Set.
- Check that the audio interface is selected as the audio device.
- Keep the microphone positioned consistently throughout the session.
- Test the input signal before recording a complete take.
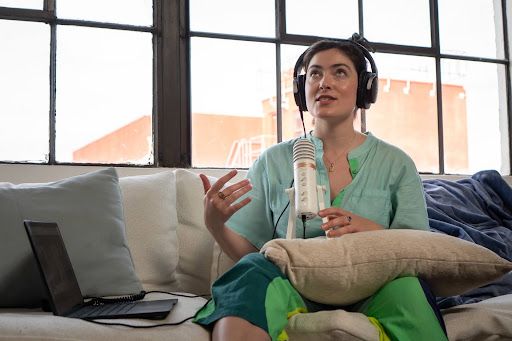
Your recording space matters as much as your equipment. Choose the quietest room available, switch off fans or air conditioning while you record, and keep the mic away from bare walls and windows, which reflect sound into the microphone. Soft furnishings like curtains, rugs, and a couch help absorb those reflections.
How to Record Vocals in Ableton: 10 Steps for Better Recordings
The steps below follow a typical vocal recording workflow in Ableton Live 12:
Step 1: Connect Your Microphone and Audio Interface
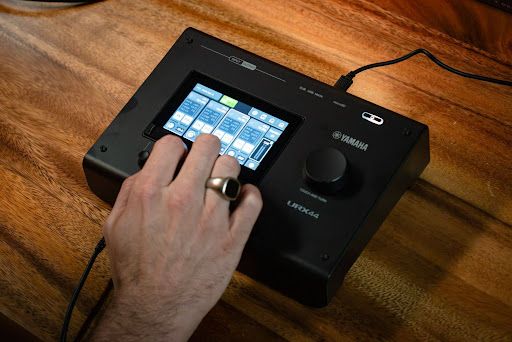
Connect the microphone to an available microphone input on the audio interface. If you are using a condenser microphone, make sure the interface supplies the required phantom power according to the microphone's specifications.
Then connect the audio interface to your computer and confirm that the interface is available to Ableton Live.
Speak or sing into the microphone and check whether the interface shows an input signal.
Quick connection check:
- The microphone is connected to the intended input.
- The interface is connected to the computer.
- Headphones are connected for monitoring.
- Input signal appears when you speak or sing.
A common setup mistake is connecting the microphone to one interface input but selecting a different input channel in Live.
Step 2: Select Your Audio Interface in Ableton
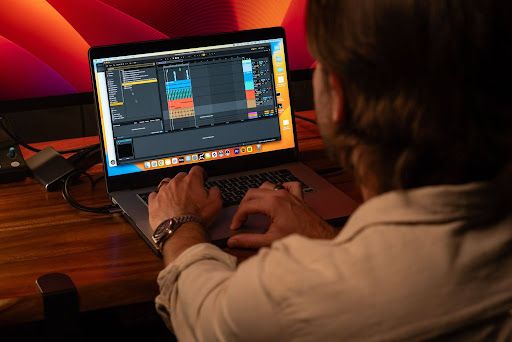
Once the microphone is connected, select your audio interface in Ableton's Audio settings. Choose the interface as the input device and output device when appropriate. The available input and output channels depend on the audio hardware enabled in Live's Audio settings.
- Audio device selection: Select your audio interface as the Input Device and Output Device in Live's Audio settings.
- Input and output settings: Enable the specific input and output channels you want to use under the interface's Input Config and Output Config settings.
- Latency check: Check the latency settings before recording. A smaller buffer can provide more responsive monitoring, although the appropriate setting depends on your computer and audio interface.
Step 3: Create an Audio Track
Insert a new audio track from the Create menu (Cmd+T on Mac or Ctrl+T on Windows). Name the track clearly, such as Lead Vocal or Vocal Take 1. Clear naming becomes increasingly useful when recording several performances.
An audio track can receive an external audio input and record that signal into Live.
Before recording, check that:
- The track is an audio track.
- It has the correct input source.
- The track is routed to the intended output.
- The track is ready to be armed.
Keeping vocal tracks organized from the beginning makes later editing easier.
Step 4: Select the Correct Microphone Input
Open the track's In/Out section by enabling In/Out. It’s located under View > Mixer Controls > In/Out. In Ableton Live, “Audio From” determines the track's input source.
Set the "Audio From" chooser to Ext. In, then select the input your mic is plugged into. For example, if the microphone is connected to Input 1 on the interface, select the corresponding external input in the audio track.
Watch the track meter while speaking or singing.
If there is no signal:
- Check the microphone connection.
- Check the interface input.
- Check the input selected in Live.
- Check the interface's input gain.
- Confirm that the correct audio device is selected.
Step 5: Set the Vocal Monitoring Mode
Monitoring determines how you hear the incoming vocal signal while recording. Ableton Live offers three main monitoring settings: Off, Auto, and In.
With Auto, the input is monitored when the track is record-enabled. With In, the incoming signal is continuously passed through the track. Off prevents the incoming signal from passing through Live's monitored output.
For vocals, direct monitoring through your interface with the track's Monitor set to Off usually gives the lowest latency.
- Check vocal playback: Sing into the microphone and confirm that you can hear the vocal signal as expected.
- Avoid monitoring delay: Don't use direct monitoring and Live's Auto or In monitoring at the same time. You'll hear your voice twice, once instantly and once slightly delayed, which creates a distracting, phasey sound. If you hear that doubling, turn one of the two monitoring paths off.
Step 6: Adjust the Recording Level
Set the microphone's input gain using the controls on your audio interface, not the volume fader on Live's track. The fader only changes playback volume, not how loud the signal is when it's recorded. Ask the vocalist to sing the loudest section of the song while you adjust.
- Avoid clipping: Clipping happens when a signal exceeds the maximum level a digital system can capture. It flattens the peaks of the waveform and adds distortion that can't be removed later, so if your interface's clip light or Live's meter hits red, lower the gain and try again.
- Leave enough headroom: Aim for the loudest phrases to peak comfortably below 0 dB, while still keeping the input level high enough to avoid unnecessary noise. Recording at 24-bit, which you can confirm under Record, Warp & Launch in Settings, gives you plenty of resolution, so there's no need to record as loud as possible.
Step 7: Arm the Vocal Track
Once the input and monitoring settings are ready, arm the vocal track for recording. Click the Arm button on your vocal track. By default, arming one track unarms the others, which helps prevent recording onto the wrong track by accident.
- Select the correct track: Make sure the vocal track is the one being record-enabled.
- Confirm input signal: Sing into the microphone and check that the track meter responds.
- Final recording check: Put on your headphones, check the monitoring level, and make sure the project is ready to record.
In Live, a track is prepared for recording by activating its record-arm control.
Step 8: Start Recording Your Vocals
Start recording once the track is armed and the input level is set. Leave a short lead-in before the vocal begins. This gives you time to settle into the performance and can make editing easier.
For a song, record the complete section or performance rather than stopping after every small mistake. Natural performances can be easier to edit later than numerous fragmented recordings.
If you are recording along with a project, enable the metronome when needed. Ableton's metronome can provide a timing reference during recording.
Focus on:
- Consistent microphone distance.
- Clear pronunciation.
- Controlled dynamics.
- Timing with the instrumental.
Step 9: Review and Edit Your Vocal Recording
After recording, listen to the take from beginning to end.
Check for:
- Background noise.
- Clipping or overloaded sections.
- Unwanted sounds.
- Timing issues.
- Performance inconsistencies.
- Sections that need another take.
Do not immediately delete a take because of one imperfect section. A recording may contain several strong phrases that can be useful during editing. Keep useful takes clearly labeled so they can be compared later.
Step 10: Record Additional Vocal Takes
Recording several performances gives you more material to review and edit. Create additional takes and label them clearly, such as:
- Lead Vocal Take 1
- Lead Vocal Take 2
- Lead Vocal Take 3
- Chorus Take 1
Ableton Live also has Take Lanes built in for this. When you record more than once over the same section in Arrangement View, each pass is kept on its own Take Lane under the track, so you can audition them in place rather than managing separate tracks.
From there, comping lets you select the best sections from different Take Lanes and combine them in the main lane to build one continuous performance.
Tips for Getting Cleaner Vocal Recordings in Ableton
Good vocal recordings depend on more than the settings inside Ableton. The microphone, room, performance, and recording technique all contribute to the final result. Here are a few tips to keep in mind when recording vocals in Ableton:
- Record in a quiet space: Minimize background sounds from fans, air conditioners, traffic, and other equipment before recording.
- Maintain consistent microphone placement: Keep a steady distance from the microphone throughout each take to maintain a consistent vocal level and tone.
- Use closed-back headphones for monitoring: Closed-back headphones allow you to hear the instrumental and your vocal without sending the backing track into the microphone.
- Check the input level: Test the loudest part of the performance before recording. Keep the input level below clipping while leaving enough headroom.
- Avoid excessive processing while recording: Record a clean vocal signal so EQ, compression, reverb, and other effects can be adjusted during mixing.
- Check for latency: If your voice sounds delayed while monitoring, review the buffer size and monitoring settings in Ableton.
- Record multiple takes: Several performances give you more options when selecting the strongest sections of a vocal.
- Keep takes organized: Label tracks and recordings clearly so you can quickly identify different performances during editing.
What to Do After Recording Your Vocals in Ableton
After recording, listen through each take before beginning detailed vocal processing. Check the recordings for unwanted noise, clipping, timing issues, and performance variations.
Keep the strongest takes and organize the recordings so they are easy to access during editing. If multiple takes are available, compare the performances and select the sections that fit the song.
The next stage can include:
- Comping: Combine the strongest sections from multiple vocal takes into one performance.
- Editing: Clean unwanted sections and make timing adjustments where needed.
- Level adjustment: Balance the vocal clips so noticeable level differences are easier to manage.
- EQ: Shape the vocal's frequency balance as part of the mixing process.
- Compression: Control dynamic changes and help the vocal sit consistently within the mix.
- Reverb and delay: Add spatial effects according to the sound and arrangement of the track.
- Vocal layering: Add doubles, harmonies, or backing vocals where they support the arrangement.
- Automation: Adjust vocal levels at different points in the song for a more controlled mix.
Keep the original vocal takes available even after creating an edited version. This gives you the option to return to the original performances if you need to change the edit later.
Bring your vocal recordings into a complete production workflow with Yamaha Creator Pass. Ableton Live 12 Lite is available with the Growth and Pro Pass in yearly plans, so you can record, arrange, and edit your music. Explore the Growth and Pro Pass and start creating today.
FAQs
Can you record vocals directly into Ableton?
Yes. You can record vocals directly in Ableton Live by connecting a microphone through an audio interface, selecting the appropriate input, creating an audio track, arming the track, and starting the recording. Ableton supports audio recording in both Session View and Arrangement View.
What equipment do you need to record vocals in Ableton?
You need a computer running Ableton Live, a microphone, and a way to connect it, which is usually an audio interface and an XLR cable. Closed-back headphones let you monitor without bleed, and a mic stand and pop filter improve consistency. Condenser mics also need an interface with 48V phantom power.
What microphone input should you use in Ableton?
Use the mono input that matches the physical input your mic is plugged into, such as "1" if it's connected to input 1 on your interface. Select it in the track's Audio From chooser. If the input doesn't appear, enable it under Input Config in Live's Audio settings.
Why is there a delay when recording vocals in Ableton?
A delay can occur because of audio latency between the microphone, interface, computer, and monitoring path. Check the buffer settings and monitoring mode. Direct monitoring through an audio interface can also be used to minimize monitoring latency.
How do you record vocals without background noise in Ableton?
Start by recording in a quiet environment and keeping unwanted sound sources away from the microphone. Set the input gain correctly and use headphones to prevent the backing track from being picked up by the microphone. You can also clean up unwanted noise during the editing stage.
Can you record vocals in Ableton without an audio interface?
Yes. You can record audio using another compatible input device, such as a computer's built-in microphone. However, a dedicated audio interface is commonly used with external microphones because it provides the appropriate connections and preamplification for recording. Ableton's recording workflow supports audio interfaces as the input path for microphones.